> ## Documentation Index
> Fetch the complete documentation index at: https://docs.devinenterprise.com/llms.txt
> Use this file to discover all available pages before exploring further.
# 快速入门
> 创建一个 outpost,并通过单台机器处理会话
* 已启用 Outposts 的组织
* 一个具有相应 Outposts 作用域的 [v3 API 令牌](/zh/api-reference/v3/overview):
* `account.outposts.orchestrator`:用于管理 outpost 的 orchestrator (隐含 machine 作用域)
* `account.outposts.machine`:用于读取队列并认领/释放会话的工作器
* 一台满足以下条件的机器 (VM 或容器) :
* 已安装 Devin CLI
* 已具备[机器依赖](/zh/onboard-devin/outposts#machine-dependencies)
* 已克隆你的代码仓库,并已配置远程仓库
* 能够访问你的会话所需的构建工具、包注册表、secrets 和内部服务
会话会直接在拥有你账号权限的机器上执行。我们建议在一个你愿意
让 Agent 自由操作的专用目录下运行工作器——更理想的是,在一台专门用于
长时间运行 Agent 任务的机器上运行,比如你桌上的一台 Mac Mini。
下载并安装 [Devin CLI](/zh/cli):
```bash theme={null}
curl -fsSL https://cli.devin.ai/install.sh | bash
```
在 [Devin Cloud](https://app.devin.ai) 中,前往 Settings → Environment → Outposts,然后点击 "Create Outpost" 按钮。
为你的 Outpost 命名,并选择它要服务的机器类型 (例如 Linux、Windows 或 Mac) 。然后点击 "Create" 按钮。
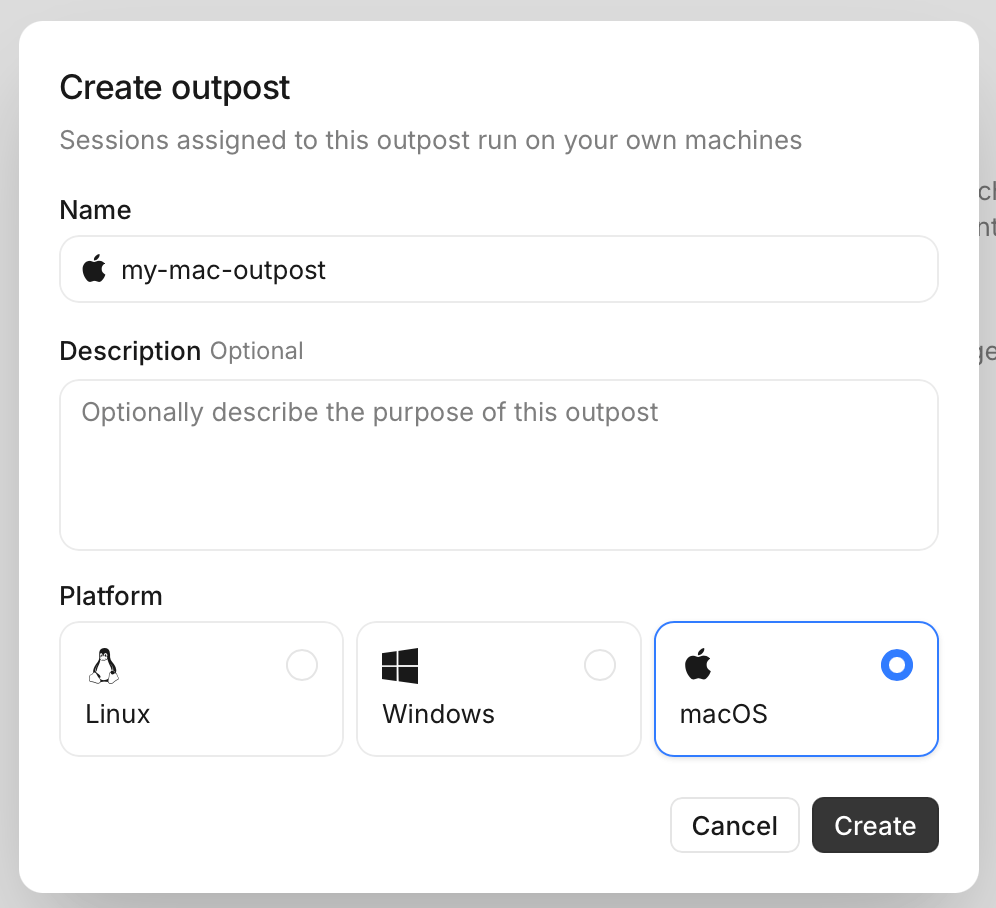 创建 Outpost 后,你会获得一个 Outpost 令牌,分配给它的工作器将使用该令牌向 Devin 进行身份验证。
复制该令牌并将其保存在安全的地方,以备后续使用。**该令牌只会在创建 Outpost 时显示一次**。
进入你希望工作器运行的目录:
```bash theme={null}
cd /path/to/worker/directory
```
然后使用你之前复制的 Outpost 名称和令牌运行 `devin worker start` 命令:
```bash theme={null}
devin worker start --outpost= --token=
```
在 [Devin Cloud](https://app.devin.ai) 上,启动一个新会话并将其配置为在你的 Outpost 上运行。在 "Configuration" → "Virtual environment" 下,你会看到新创建的 Outpost 已列出。选择它即可让会话在该 Outpost 上运行。
现在你可以让 Devin 在你的机器上开始构建了!可以先试一个简单的例子:
```
Create a "hello world" python script for me
```
然后看着脚本出现在你的工作器目录中!
### 后续步骤
在你的代码所在目录中启动工作器,然后让 Devin 在现有代码基础上继续构建。会话可以看到工作器工作目录下已检出的代码仓库。要同时处理更多会话,请在更多机器上运行指向同一 outpost 的工作器:N 个工作器可处理 N 个并发会话,其余会在队列中等待。
在会话排队时自动预配机器,而不是始终保留长期运行的工作器。
在你已经使用的平台上运行 outpost——Namespace、Modal、E2B 等。
在 [Devin Cloud](https://app.devin.ai) 中,前往 Settings → Environment → Outposts,然后点击“Create Outpost”按钮。
为你的 Outpost 命名,并选择 Linux 作为平台 (你的容器运行在 Linux 上) 。然后点击“Create”按钮。
创建 Outpost 后,你会获得一个 Outpost 令牌,分配给它的工作器将使用该令牌向 Devin 进行身份验证。
复制该令牌并将其保存在安全的地方,以备后续使用。**该令牌只会在创建 Outpost 时显示一次**。
进入你希望工作器运行的目录:
```bash theme={null}
cd /path/to/worker/directory
```
然后使用你之前复制的 Outpost 名称和令牌运行 `devin worker start` 命令:
```bash theme={null}
devin worker start --outpost= --token=
```
在 [Devin Cloud](https://app.devin.ai) 上,启动一个新会话并将其配置为在你的 Outpost 上运行。在 "Configuration" → "Virtual environment" 下,你会看到新创建的 Outpost 已列出。选择它即可让会话在该 Outpost 上运行。
现在你可以让 Devin 在你的机器上开始构建了!可以先试一个简单的例子:
```
Create a "hello world" python script for me
```
然后看着脚本出现在你的工作器目录中!
### 后续步骤
在你的代码所在目录中启动工作器,然后让 Devin 在现有代码基础上继续构建。会话可以看到工作器工作目录下已检出的代码仓库。要同时处理更多会话,请在更多机器上运行指向同一 outpost 的工作器:N 个工作器可处理 N 个并发会话,其余会在队列中等待。
在会话排队时自动预配机器,而不是始终保留长期运行的工作器。
在你已经使用的平台上运行 outpost——Namespace、Modal、E2B 等。
在 [Devin Cloud](https://app.devin.ai) 中,前往 Settings → Environment → Outposts,然后点击“Create Outpost”按钮。
为你的 Outpost 命名,并选择 Linux 作为平台 (你的容器运行在 Linux 上) 。然后点击“Create”按钮。
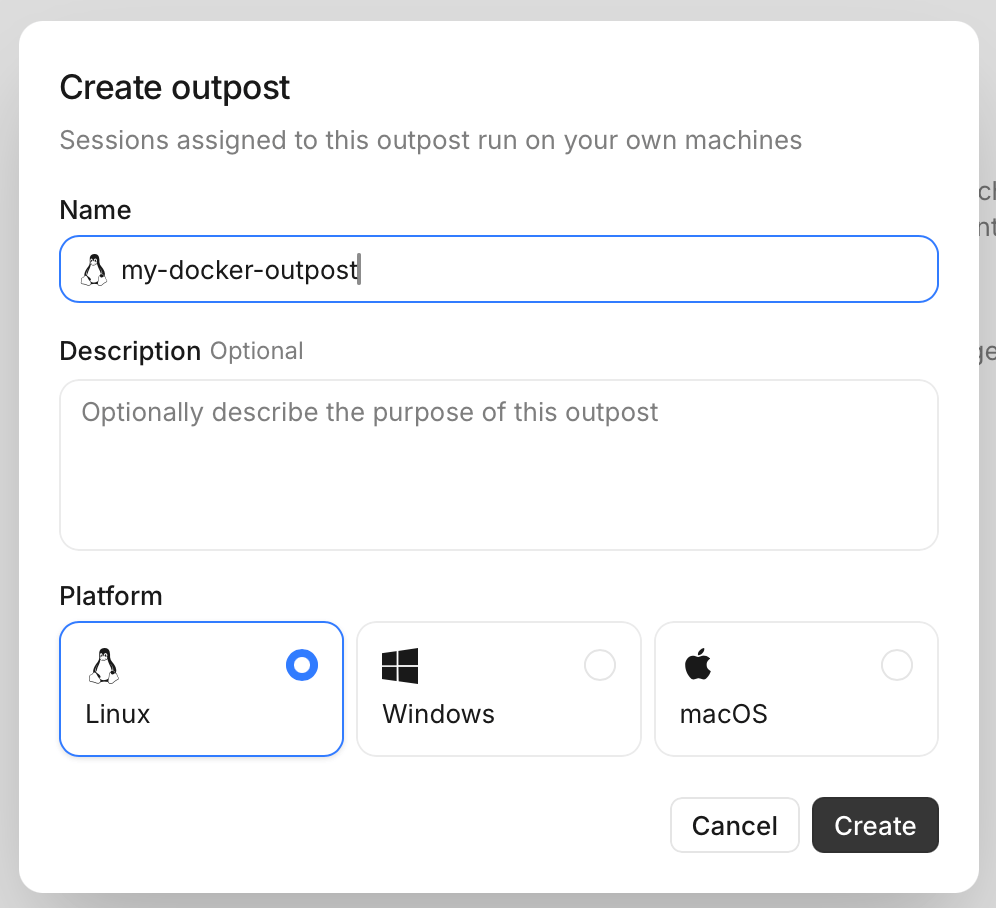 创建 Outpost 后,你会获得一个 Outpost 令牌;要分配到该 Outpost 的工作器将使用此令牌向 Devin 完成身份验证。
复制该令牌并将其保存在安全的位置,以供后续使用。**该令牌只会在创建 Outpost 时显示一次**。
基于官方 Devin CLI 镜像 (`public.ecr.aws/e0h8a4b6/devin-cli`) 进行构建,并添加[机器依赖项](/zh/onboard-devin/outposts#machine-dependencies)以及你的会话所需的任何代码仓库或工具:
```dockerfile Dockerfile theme={null}
# Devin CLI 已预装,是该镜像的 entrypoint。
# 使用 :stable,或固定到特定的 CLI 版本标签。
FROM public.ecr.aws/e0h8a4b6/devin-cli:stable
# git 为必需项;ffmpeg 可启用屏幕录制功能
RUN apt-get update && apt-get install -y --no-install-recommends \
ca-certificates git ffmpeg \
&& rm -rf /var/lib/apt/lists/*
# 工作器运行所在的目录
WORKDIR /repos
# 可选:克隆你的 session 所需的代码仓库:
# RUN git clone https://github.com/your-org/app.git \
# && git clone https://github.com/your-org/infra.git
CMD ["worker", "start"]
```
或者让 Devin 为你生成一个 Dockerfile:
```
Write a Dockerfile for a Devin Outposts worker image. Base it on
public.ecr.aws/e0h8a4b6/devin-cli:stable, which has the Devin CLI preinstalled
as the image's entrypoint. Install git and ffmpeg. Clone these repositories
into the working directory the worker runs in: . The default
command should be ["worker", "start"].
```
Browser 功能需要镜像中安装 Chrome 或 Chromium,并且
`DEVIN_CHROME_PATH` 要指向该二进制程序。基础镜像是 Ubuntu,而
Ubuntu 的 `chromium` apt 软件包只是一个无法在
容器中使用的 snap 存根包——对于 amd64 镜像,请改为安装 Google Chrome:
```dockerfile theme={null}
RUN apt-get update && apt-get install -y --no-install-recommends curl \
&& curl -fsSL https://dl.google.com/linux/direct/google-chrome-stable_current_amd64.deb -o /tmp/chrome.deb \
&& apt-get install -y --no-install-recommends /tmp/chrome.deb \
&& rm /tmp/chrome.deb && rm -rf /var/lib/apt/lists/*
ENV DEVIN_CHROME_PATH=/usr/bin/google-chrome
```
对于私有代码仓库,请通过你偏好的方式 (例如 [build secrets](https://docs.docker.com/build/building/secrets/)) 将凭据嵌入镜像中,以便在运行时能够正常执行克隆并访问远程仓库。
当你确认 Dockerfile 没问题后,构建该镜像:
```bash theme={null}
docker build -t devin-worker .
```
使用 `worker start` 命令基于你的镜像启动一个容器,并传入你的 Outpost 名称以及你之前复制的令牌 (该镜像的 entrypoint 是 Devin CLI,因此参数会直接传给 `devin`) :
```bash theme={null}
docker run devin-worker \
worker start --outpost= --token=
```
在 [Devin Cloud](https://app.devin.ai) 上,启动一个新 session,并将其配置为在你的 Outpost 上运行。在 "Configuration" → "Virtual environment" 下,你会看到新建的 Outpost 已列出。选择它,即可让你的 session 在该 Outpost 上运行。
现在,你可以让 Devin 开始在你的 container 中进行构建了!可以先试试一些简单的内容,比如
```
Create a "hello world" python script for me
```
然后即可看到脚本出现在容器的工作目录中!
### 后续步骤
将你希望 Devin 使用的代码仓库预置到 image 中,并让 Devin 在此基础上进行构建——session 将看到已检出至工作器工作目录下的代码仓库。如需并发处理更多 session,可运行更多指向同一 outpost 的 container:N 个工作器可并发处理 N 个 session,其余 session 在队列中等待。
在会话进入队列时自动预配容器,无需一直保留长期运行的工作器。
在你已使用的平台上运行 outpost——Namespace、Modal、E2B 等。
创建 Outpost 后,你会获得一个 Outpost 令牌;要分配到该 Outpost 的工作器将使用此令牌向 Devin 完成身份验证。
复制该令牌并将其保存在安全的位置,以供后续使用。**该令牌只会在创建 Outpost 时显示一次**。
基于官方 Devin CLI 镜像 (`public.ecr.aws/e0h8a4b6/devin-cli`) 进行构建,并添加[机器依赖项](/zh/onboard-devin/outposts#machine-dependencies)以及你的会话所需的任何代码仓库或工具:
```dockerfile Dockerfile theme={null}
# Devin CLI 已预装,是该镜像的 entrypoint。
# 使用 :stable,或固定到特定的 CLI 版本标签。
FROM public.ecr.aws/e0h8a4b6/devin-cli:stable
# git 为必需项;ffmpeg 可启用屏幕录制功能
RUN apt-get update && apt-get install -y --no-install-recommends \
ca-certificates git ffmpeg \
&& rm -rf /var/lib/apt/lists/*
# 工作器运行所在的目录
WORKDIR /repos
# 可选:克隆你的 session 所需的代码仓库:
# RUN git clone https://github.com/your-org/app.git \
# && git clone https://github.com/your-org/infra.git
CMD ["worker", "start"]
```
或者让 Devin 为你生成一个 Dockerfile:
```
Write a Dockerfile for a Devin Outposts worker image. Base it on
public.ecr.aws/e0h8a4b6/devin-cli:stable, which has the Devin CLI preinstalled
as the image's entrypoint. Install git and ffmpeg. Clone these repositories
into the working directory the worker runs in: . The default
command should be ["worker", "start"].
```
Browser 功能需要镜像中安装 Chrome 或 Chromium,并且
`DEVIN_CHROME_PATH` 要指向该二进制程序。基础镜像是 Ubuntu,而
Ubuntu 的 `chromium` apt 软件包只是一个无法在
容器中使用的 snap 存根包——对于 amd64 镜像,请改为安装 Google Chrome:
```dockerfile theme={null}
RUN apt-get update && apt-get install -y --no-install-recommends curl \
&& curl -fsSL https://dl.google.com/linux/direct/google-chrome-stable_current_amd64.deb -o /tmp/chrome.deb \
&& apt-get install -y --no-install-recommends /tmp/chrome.deb \
&& rm /tmp/chrome.deb && rm -rf /var/lib/apt/lists/*
ENV DEVIN_CHROME_PATH=/usr/bin/google-chrome
```
对于私有代码仓库,请通过你偏好的方式 (例如 [build secrets](https://docs.docker.com/build/building/secrets/)) 将凭据嵌入镜像中,以便在运行时能够正常执行克隆并访问远程仓库。
当你确认 Dockerfile 没问题后,构建该镜像:
```bash theme={null}
docker build -t devin-worker .
```
使用 `worker start` 命令基于你的镜像启动一个容器,并传入你的 Outpost 名称以及你之前复制的令牌 (该镜像的 entrypoint 是 Devin CLI,因此参数会直接传给 `devin`) :
```bash theme={null}
docker run devin-worker \
worker start --outpost= --token=
```
在 [Devin Cloud](https://app.devin.ai) 上,启动一个新 session,并将其配置为在你的 Outpost 上运行。在 "Configuration" → "Virtual environment" 下,你会看到新建的 Outpost 已列出。选择它,即可让你的 session 在该 Outpost 上运行。
现在,你可以让 Devin 开始在你的 container 中进行构建了!可以先试试一些简单的内容,比如
```
Create a "hello world" python script for me
```
然后即可看到脚本出现在容器的工作目录中!
### 后续步骤
将你希望 Devin 使用的代码仓库预置到 image 中,并让 Devin 在此基础上进行构建——session 将看到已检出至工作器工作目录下的代码仓库。如需并发处理更多 session,可运行更多指向同一 outpost 的 container:N 个工作器可并发处理 N 个 session,其余 session 在队列中等待。
在会话进入队列时自动预配容器,无需一直保留长期运行的工作器。
在你已使用的平台上运行 outpost——Namespace、Modal、E2B 等。